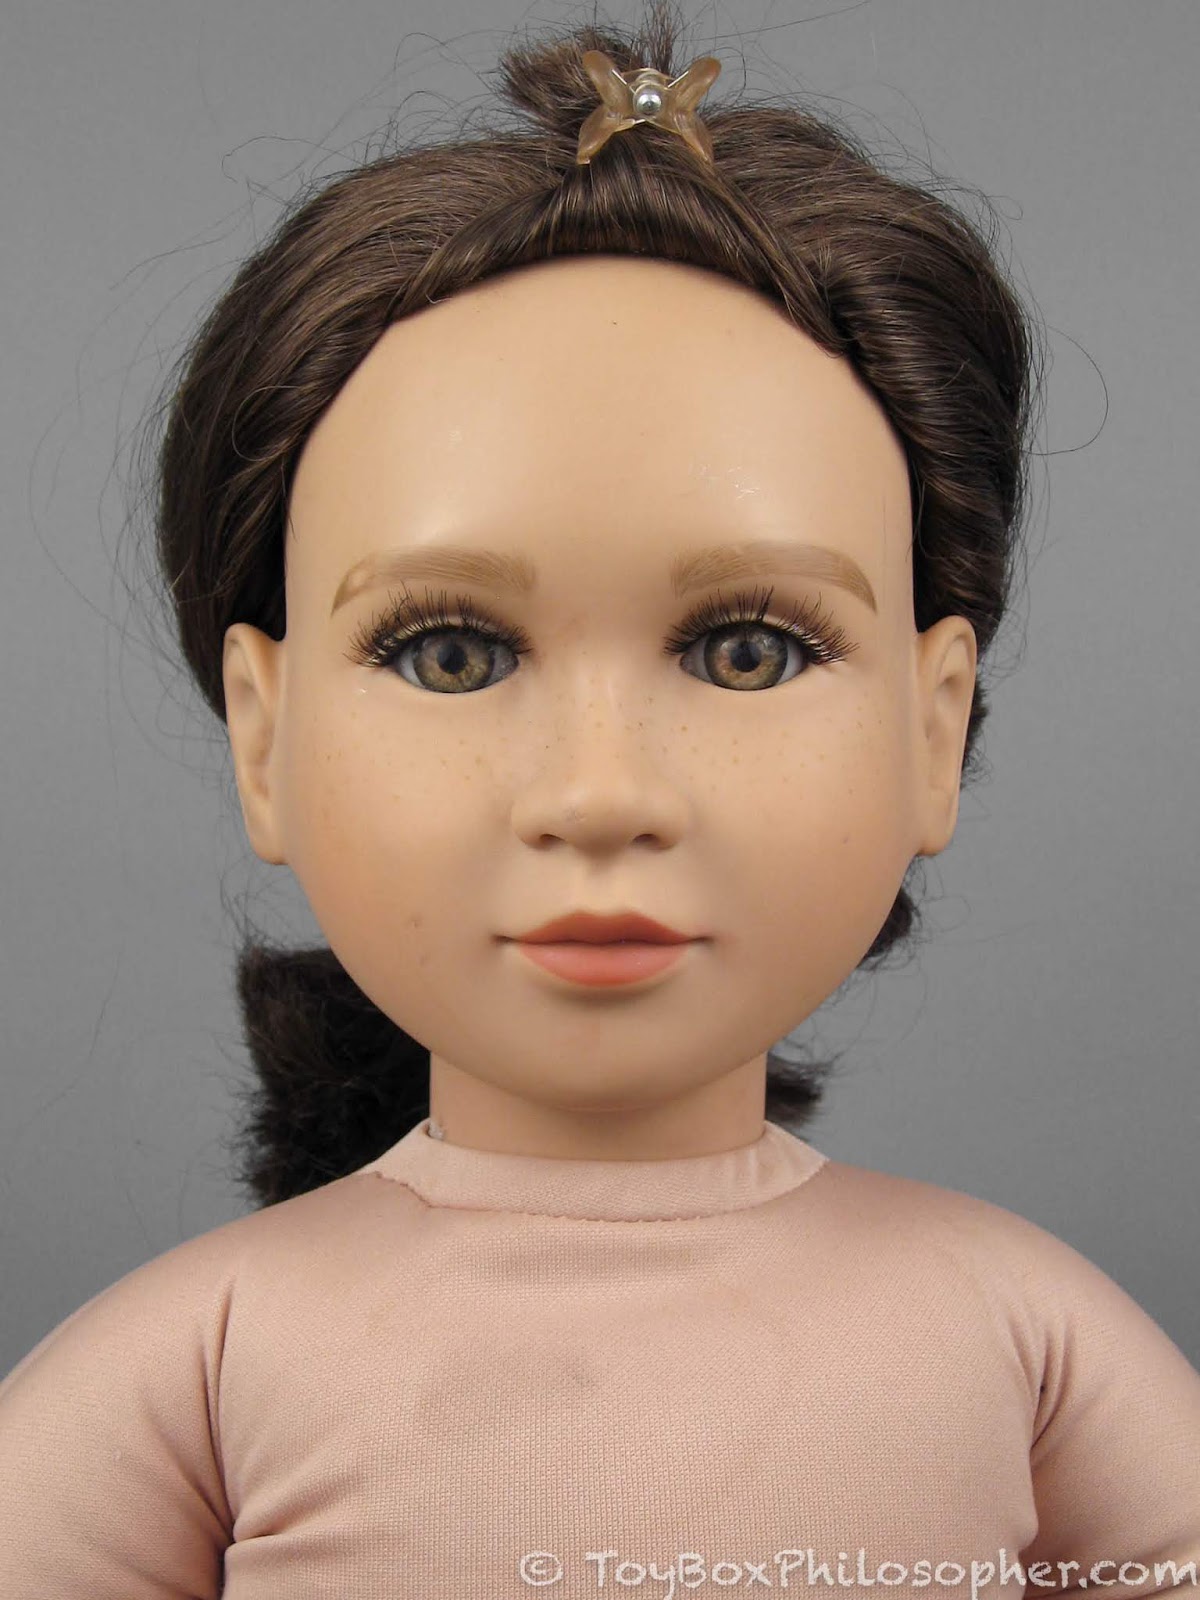
Anyone who used to read Toy Box Philosopher might remember The Lenora Saga, featuring this poor doll with massive stains and a missing little finger:
 |
| My well-loved Denver-era My Twinn Lenora. |
I didn't even really need to add that link to the old Toy Box Philosopher post because I've imported the highlights (some of them verbatim) here so that I can re-cap Lenora's journey for anyone who isn't familiar with it yet.
At first I assumed that Lenora had too many flaws to be sold, but I figure at the right price she might still be able to find a new home.
Here are a few pictures of Lenora when she first arrived at my house:
At first I assumed that Lenora had too many flaws to be sold, but I figure at the right price she might still be able to find a new home.
Here are a few pictures of Lenora when she first arrived at my house:

She had extensive staining on her upper arms (not just dirt, but deep stains):

A missing pinkie finger on her right hand:

And some scuffs, stains, and white paint marks on her legs:


On her head, she had a dry, thinning wig:

Dry wigs I can fix, but thinning wigs are a different matter.
She also had missing eyelashes and blocky eyebrows with missing paint:
Lenora's eyes were also mismatched (fading), and she had a deep scuff on the tip of her nose:


There was evidence that this doll's head had been removed at one time (the cable tie was not original):

But her body tag identifies her as a Denver doll:

I struggled quite a bit with Lenora's makeover, but she taught me a lot about My Twinn dolls along the way!
The biggest challenge was the missing finger, but another huge hurdle was the fact that Lenora's vinyl cracked during her first eye replacement:

Here's a better look at the cracks around her right eye:

Not only was there a deep crack at the edge of this eye, but there were little micro-cracks all along the upper lid:

Here's the (super-glued) crack at the edge of the left eye:

I was pretty discouraged by this damage, but forged ahead anyway.
I re-heated her head and popped the green eyes out. When this (brutal!) process didn't cause any more cracks, I figured maybe the head was tougher than it looked.
Feeling a bit more optimistic, I worked on sanding down the cracks again--this time with fierce determination (and a Dremel).
After several days of careful Dremeling and hand-sanding, I was content that the cracks were mostly gone. I sanded away all of the super glue, too, because it was a cheap and unsightly fix.
Instead of re-heating Lenora's eye sockets to replace the eyes, I opened up the back of her head. I hate doing this, but it puts less stress on the edges of the eyes. I didn't want to risk ruining all of my hard work.

I find it really hard to replace eyes from the back. The vinyl that encases the eyes has to be slit with a sharp knife, peeled away (without damaging any visible vinyl on the face) and then the eyes have to be maneuvered into place through the awkwardly small hole in the head.

This time around, I chose a darker eye color for Lenora, hoping it would de-emphasize the yellow in her vinyl:

These are Newborn Midnight eyes from Secrist. I feel like these eyes are different every time I order them--sometimes they're way too dark, sometimes they're a beautiful shade of dark blue. These are some of the good ones.
I hadn't fully seated the eyes in these next pictures, but you can see that the cracks are much less noticeable:

With a reminder of how bad it was:

The eye sockets still aren't flawless, but any remaining imperfections are now nearly impossible to see with the naked eye. And there's no super glue. I had to use vinyl glue at the backs of the eyes (to hold them in place) so I hope that stays put and doesn't cause any discoloration over the years.
With the eyes sorted out, I forged ahead with cleaning the stains off of Lenora's body. For the deep stains that couldn't be cleaned with a Magic Eraser, I purchased Twin Pines of Maine's magical stain remover (Remove-Zit) and the Formula 9-1-1 cleaner that's needed to remove the Remove-Zit!

After I removed Lenora's body stuffing, I slathered huge amounts of Remove-Zit all over her arms and legs:

This stuff is thick and sticky and hard to spread, and I don't think it was intended to be applied this liberally (the company suggests using a toothpick for application...) but I went a little nuts:
 |
| Die, stains, die! |
The Remove-Zit had to sit for several weeks. In fact, I had to scrape it off and re-apply it every time it dried out. It was a slow, sticky process.
To fix the missing little finger, I followed a wonderful tutorial on the This Old Doll website. Not only is the tutorial well-written and simple to follow, but all of the supplies are for sale on site.
I won't re-write that tutorial (I couldn't do it justice!), but I'll summarize the process.
I used Amazing Mold Putty to make a mold from another My Twinn doll's hand (one that wasn't missing any fingers):

Making the mold was easy. I just mixed equal parts of the yellow and white putty and then pressed the little finger of an undamaged doll into the mix. The putty turns rubbery and solid pretty quickly, and then pulls away from the vinyl with no residue or staining.


To fill the mold, I used Plastic Paste:

This is also really easy to use. You just mix equal parts of each kind of paste and fill your mold!

The resulting mixture looks like peanut butter:
 |
| Yummy. |
I made the mistake of mixing the paste with a good butter knife and a ceramic cup. It was very hard to clean these things afterwards!
The only challenge was getting the Plastic Paste into the tiny finger hole:
I ended up using a syringe to inject the paste into the mold, and then I taped the mold to Lenora's hand and let it dry.
Here's the completed finger as I was painting it:

I think the shape of this finger turned out really well. The color match of the paint isn't great, and there are still little air bubbles and imperfections where the molded finger meets the vinyl. However...I decided it was good enough.
With that out of the way, I turned my attention back to Lenora's head.
In my ongoing quest to de-emphasize her yellowed vinyl, I decided to pair her new dark blue eyes with a jet-black wig. It makes her look very pale!
 |
| Black magic. |
This beautiful wig is from Exquisite Doll Designs.
Once I'd decided on a wig, I finished Lenora's face to match. I gave her dark eyebrows, dark eyelashes, rosy cheeks, and a few faint freckles:

These eyebrows were really hard to draw...and didn't turn out very well:


I also placed one of Lenora's lower eyelashes badly. It sticks out too far from the eye:

I glued the pate back onto the head:

And re-attached Lenora's head to her freshly-cleaned body!

Here are various views of the repaired finger:


You can see that the repair isn't great, but because it's the little finger, it's easy to ignore and I often totally forget that there's anything wrong with this hand.

The stains on the vinyl limbs came out nicely for the most part, but you can probably see a very faint line of staining right near the junction of cloth and vinyl on the left arm. That's because I was worried about getting Remove-Zit on the cloth, so I didn't apply it right at the seam.

There's also still a dark area on the cloth torso that I was not able to remove--even with a bit of bleach.
Here's Lenora with her wig glued down:


I think she looks like a completely different doll. Here's her original before-and-after GIF:

The black hair looks great with red clothing:

But I preferred Lenora in this blue velvet dress:


I took Lenora to the beach to celebrate the day when she was finally completed! Here are a few of the best pictures from that fun outing:


When I decided to sell Lenora, the first thing I did was erase her eyebrows and try to make them darker and less sloppy.
I'm a little better at painting eyebrows now, and I'm also in the habit of using acrylic paints, which are much more durable than the watercolor pencils I used for Lenora's first makeover.
Here are her new eyebrows:

There's still a faint yellow residue from her original eyebrows, but the new darker brows cover the area better than the old ones.
Her body is in good shape, with no squeaking and very few pulls in the fabric.

When I re-sewed Lenora's back seam, I only had white thread, so this area looks a little funny:

Here's the dark stain that I couldn't remove from her chest:

And here's a close-up of the sloppy little finger repair:
 |
| That's a little embarrassing. |
But let's focus on the positive! Here are a few more pictures of Lenora's new face paint:


Because of her blue eyes, Lenora got the blue striped dress from Doll Clothes by Carole. She will not come with the blue velvet dress she was wearing in the earlier pictures ( I need that dress for a very special doll):


I think this dress looks wonderful on her!


Despite Lenora's complicated history, I think she's one of the prettiest dolls I have. If her flaws and quirks don't bother you, you might enjoy her quiet beauty as much as I do.
Here's a summary of all the work that was done on Lenora:
-deep body cleaning
-stain removal and surface cleaning of all vinyl parts
-sanding of the face to remove gouges and scuffs
-sanding of eye sockets to reduce micro cracks
-removal of the back of the head for eye placement
-new Secrist acrylic dark blue eyes (glued into place from the back)
-new eyelashes
-new black wig from Exquisite Doll Designs
-new face paint, including faint freckles and eyebrows.
-re-sewn back seam (with white thread...)
-molded finger repair
-custom outfit from Doll Clothes by Carole
Lenora's biggest flaws are:
-the back of her head was removed to place the eyes
-the eyes were glued into place with vinyl glue
-her finger repair is very amateur
I just love this sweet girl, but I truly have to clear dolls out of this house. If you're willing to take a chance on a pretty face with a rocky past, then please visit Lenora in the Etsy shop!
Lenora has found a wonderful home! Thank you.

Emily, I loved your TBP blog and especially enjoyed your My Twinn restoration posts, so I was very happy when you started this new blog. I recently found a My Twinn doll at the local thrift store, and because of what I learned from you I couldn't just leave her there. She has a terrible crack next to her left eye, but she was only $5 and will be a good doll to try new skills on. She's been languishing a bit because I wasn't feeling very inspired and didn't really like her face mold or coloring, but I think I've found the perfect wig color and style for her, and now I'm excited to get to work; that's the thrill of it, isn't it? Thanks for documenting all your tips and trials, because I certainly will need the guidance.
ReplyDeleteHi Bunnie, how exciting to be restoring your first doll!! And $5 is INCREDIBLE. Wow. You can't go wrong! I would love, love, love to see before and after shots!
DeleteAnd you're right, the thrill is all in getting a good vision for a particular doll and then trying to make your vision a reality. I've spent today trying to picture a Kate with medium (non-Denver) vinyl as her new self, and it's been hard! I love the creative part of it, though.
Does the crack near your girl's eye extend past the eye socket? I've never encountered one like that before. That's a big challenge to tackle! Smaller cracks can usually be sanded, which is pretty satisfying.
In any case--best of luck to you! Keep us updated on your progress!! I'm always happy to chat about doll restoration and offer whatever help I can.
I will try to take some before and after photos for sure. She's a Beth mold as far as I can tell (her head is stamped "Joanne I-E"), and her body tag says 2012. The crack is pretty severe - it's not in the eye socket, but a few millimeters from the outside corner of the eye. It runs vertically from her eyebrow to almost halfway down her cheek, just a little more than an inch long. I'm not sure if I should try gluing and sanding, or if I need to fill it with a little putty. She might just have to have a scar. And because of the crack I'm reluctant to try changing her eyes.
DeleteI don't think I can attach/send a photo here on blogger, but I'd love to send you one. Do you have a public email address? Or I can send one via Etsy if that works for you?
Oh, wow, Beth is rare! That's a truly great find. The crack sounds daunting, though. You're very brave! You can try to send me a photo through Etsy, that'd be great! If not, I can give you my private email through Etsy. I just don't want to post it here because of spam.
DeleteI did get a chance to take some photos and sent them just now via Etsy. I'd love to hear what you think.
DeleteI agree that she's beautiful. She looks like a movie star. No one could resist that face, in my opinion - even if she *is* wearing a prosthetic finger, and even if she has a nasty lobotomy scar under than lovely hair. XD
ReplyDeleteI love makeovers of hopeless cases! I got one myself, a discoloured Barbie fairy I picked up for a quarter at the flea market. She had terrible stains and a piece of lip missing, among other things. She's far from perfect, kinda looks like a burn victim from certain angles, but I loved restoring her and I love the new look! Too bad you have to sell yours. I hope the new owners appreciate the love you put into these dolls.
ReplyDelete